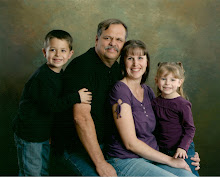
Me, that's who!
Yeah I know I went MIA for a while. I got sick, like bad sick, the kind you lose 10 lbs in 3 days, then took some time to recover and so here I am, back again =)
I've only made a couple cards since I've felt better and those aren't "show your stuff for the world to see" cards 'cause they are kinda not good.....so I decided to go with some frames I made a while back. The first I cut Cricut images out of the Birthday Cakes cartridge. Had I paid attention I would have flipped them so they matched the pattern on the paper. Oh well, I'll pretend I was going for the "opposite look".

This one was easy peasy, just add paper and ribbon and your done!

I've done frames before but I've realized there's an easier way than what I used to do. I used to put Modge Podge on the frame then cover in paper and after it was dry cut around the frame. Then I decided that didn't work and cut the paper first then Modge Podged it. Now I'm all for Modge Podge, great stuff, wonderful even, but for frames I despise it!
I now use spray adhesive and I love it! Here's the steps in case you want to try it to:
1) Paint edges in desired color with acrylic paint. Don't forget inside edges. Let dry
2) Cover painted edges with painters tape. This way edges won't get spray adhesive on them.
3) GO OUTSIDE! Spray adhesive on the frame where you want the paper.
4) Carefully, very carefully lay your paper where you want it. You don't get much of a second chance so make sure you put the paper where you want it the first time.
5) Smooth out the paper making sure there are no bubbles.
6) Cut around edges with x-acto blade.
7) Sand edges so paper is smooth.
8) Display a cute fun picture of anything you want =)
Not using Modge Podge makes the whole process so much faster because there is no drying time.
Happy Wednesday...the week is halfway over and a 3 day weekend is just ahead!


No comments:
Post a Comment