Monday, November 29, 2010
Let's Make It Official.....
.....I am now an official Stampin' Up! demonstrator! Yay! I made the decision based on the super duper cheap discount on Starter Kits right now, $87.50 going on right now....how could I resist? I joined Becky Roberts downline group at Inking Idaho. I've followed her blog for a few years now and have ordered from her. She has such amazing ideas I knew I had to join her downline group.
One Time Only
I don't think I'm alone in saying/thinking this that although my DH ooh's and aah's over my cards, he could care less about them. Basically it's like when he shows me Hot Wheels, yeah there are some cool ones but really they aren't my thing. Cards are like that with him but this one was different. I showed him my finished project and he said "wow I really like that one"! Not the normal "oooh cool" it was a genuine "I like it"! I should have stopped there because then I asked why do you like it, is it the color combo, etc....he said I don't know, I just like it.....eh works for me =)
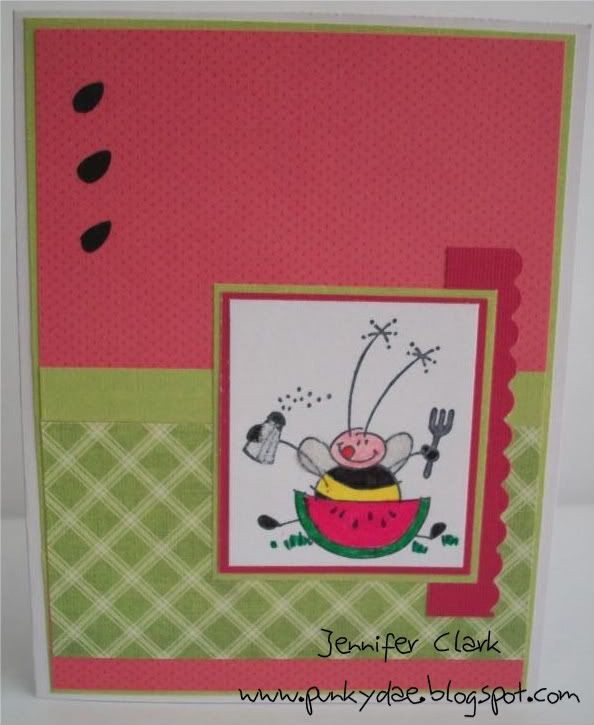
I added some clear glitter glue to the wings so they had a little sparkle and also added some white matte glitter to the salt shaker for an extra umph. The watermelon seeds on the left are cut from my Cricut, pretty cute huh?!
Ingredients:
Paper: DCWV
Ink: SU!
Stamp: Stampendous
Markers: Martha Stewart
Sunday, November 28, 2010
A Mountain of Toys
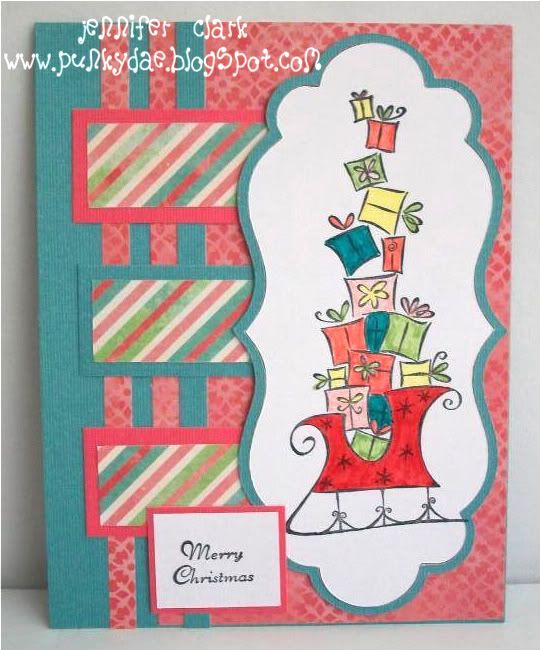
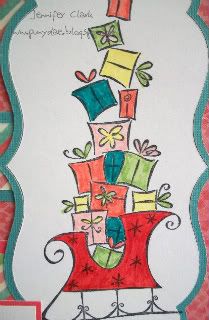
Here's another one of those sets that I swore I was going to use for so many things and have yet to do so. I didn't want to just use "traditional" colors for this card. This sleigh was screaming for bright but fun so pink and teal it was! I think the colors turned out pretty sweet. I am getting better at my coloring I think, at least it doesn't look like my DD colored it =)
C-ya!
Ingredients:
Paper: DCWV
Stamp: SU! Sleigh Full of Toys
Ink: SU!
Cricut
C-ya!


Ingredients:
Paper: DCWV
Stamp: SU! Sleigh Full of Toys
Ink: SU!
Cricut
Saturday, November 27, 2010
Pink Dahlia
So is everyone exhausted after Black Friday?! I love it! All the excitement, heart pounding deals and lack of sleep.....how can you resist a pair of kids jammies for $4?! Let alone Cricut cartridges on sale too!
Sooooooo my Thanksgiving cards had the Dahlia fold feathers and I thought I'd share a card I did a few years ago. I had seen a card while blog hopping and loved it. The blog said she'd found it on Splitcoast so I went there and got the tutorial on it. I did this card maybe 3 years ago or so, I remember it was before we moved down to SoCal and that's been over 2 years now. Anywho this was and has been my favorite card just because it looks so intricate but is so super easy.....here ya go =)
Oh oh oh and I figured out how to add a watermark over my pictures.....I was doing a happy dance while my DH just looked at me and smiled, it's the little things that make me happy!
C-ya!
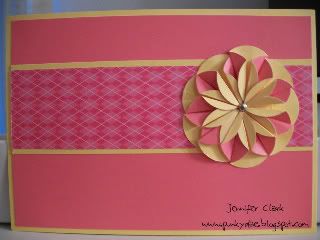

Friday, November 26, 2010
Scallop Love
I found this awesome tutorial HERE I wish I would have had this a couple years ago for my "Santa" theme. (Yes I do themes for Christmas. It's a sick habit I know) I added glitter to Santa's hat and topper. You can't really tell. He came out cute for a first try, I may try to jazz him up a little before I actually make these for friends =)
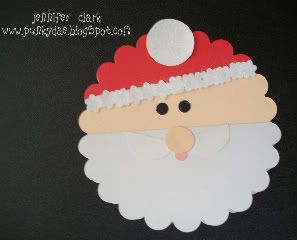
Ingredients:
Scallop die: Spellbinders
Circle punches: 1/4" {eyes, mouth}, 1/2" {nose} 3/4" {moustache & hat topper}
Flower punch bought at Target a few years ago
Glitter: Martha Stewart

Ingredients:
Scallop die: Spellbinders
Circle punches: 1/4" {eyes, mouth}, 1/2" {nose} 3/4" {moustache & hat topper}
Flower punch bought at Target a few years ago
Glitter: Martha Stewart
Thursday, November 25, 2010
Happy T-Day!
Happy Turkey Day everyone! I am determined to thoroughly cook my turkey this year, something I have been unable to accomplish the last 7 tries. At least this guy has been saved.
Here's where I got my idea. I love Tara's blog and have been following for a couple years now. Some very cute ideas over there. I have used this type of fold before, it's called a Dahlia fold and I discovered it on Splitcoaststampers. No matter where I've seen it used it always looks so elegant....even as feathers!

Ingredients:
Paper: DCWV, SU! Bravo Burgundy
Punches: SU! 1 3/4" scallop punch; flower punch from Target; Circles: 1/8" {eyes} 1/4"{buttons}, 1"{head}, 1 5/8"{body}; 3/4" square; 1 1/4x1/4" rectangle
Tuesday, November 23, 2010
The Never-Ending (and addicting) Card
On my own I would have never found this. I'm not much into You Tube stuff but one of my coworkers is. She tells me about all these cute things to look up and just as she says, "It's so cute!" This is one of the things she told me to look up. It's the never ending card and I found a super easy tutorial HERE . Ignore the paper clips in the photos, I just couldn't get the edges to lay down in the photo. I did a Christmas theme on it but I think this would be so cute for Valentine's Day or even a birthday.It was kind of frustrating at first trying to figure out how to fold and fold and fold but in the end you get a very easy card for a great TA-DA!....Thanks Barbara!


Sunday, November 21, 2010
Mr. Twigster Goes Pink
It's the end of the weekend. Not my favorite day.
I have no idea when I bought this stamp set but I had high hopes to make Christmas cards out of it. Two years later I still haven't done it. Then I found THIS and I was in heaven! It Today Mr. Twigster needed some pink. (I'm in a pink kinda mood)

 Ingredients:
Paper: DCWV, The Paper Company
Stamps: SU! Mr. Twigster
Glitter: Martha Stewart
Scallop die: Spellbinders
Tuesday, November 16, 2010
Ode to the Postal Service
As a postal worker I am partial to anything postal or stampish, so when my Cuttlebug came with stamp dies I was in seventh heaven! Of course I haven't used them a whole lot but I saw this idea (I forget where probably Splitcoast) and I CASE'd it. Super easy and super fast. Just a super easy fun way to say hello!
 Ingredients:
Paper: DCWV Animal Crackers
Stamp: SU! Sweet Shapes
 Ingredients:
Paper: DCWV Animal Crackers
Stamp: SU! Sweet Shapes
Monday, November 15, 2010
Wrinkles
Thank goodness Monday is over! Today was one of those days at work I just wanted to crawl in a hole because I was tired of being yelled at. This card is one of my favorites. I absolutely love the colors on here. I also love the stamp....I totally agree with her! After today I think I gained an extra 3 wrinkles from customers.


Ingredients:
Paper: DCWV Flower Shower stack
Stamp: SU! Wisecracks
Decorative scissors


Ingredients:
Paper: DCWV Flower Shower stack
Stamp: SU! Wisecracks
Decorative scissors
Sunday, November 14, 2010
My Poor Neglected Blog
Awww I miss my blog. I think of it often. Usually once I finish a project and think "I should really post this". That usually doesn't happen because, well I'm usually interrupted by a fight breaking out amongst my Thing 1 and Thing 2.
I however have been a busy bee crafting. In fact just this weekend I made teacher Thanksgiving gifts, made a card for a challenge and made a "Fall" banner for the mantle =) See, I craft, I just don't post it. But I'm going to attempt to be better. I really need to learn how to schedule posts.....
Anywho....here is my Thanksgiving teacher gift for the kids' teachers. I used the instructions off of Splitcoaststampers for the Milk Carton Box. Now for the carrier that's a different story. I've seen all over blogland different tutorials for the carrier. There is one on Inking Idaho for sale but it holds 4 containers and I'm on a short time table and don't want to make 8 milk cartons. I found another one with step by step instructions for free! Minor detail I didn't realize....after making it I realized it was for a "Mini Milk Carton Container". Um, yeah, that didn't work. So when all else fails I figure it out and after trial and error I came up with this. It may not be perfect but the cartons stay in there and don't fall out! Pretty darn cute if I do say so myself.

 I just stamped a leaf from SU! Simple Seasons with VersaMark all over the carton and holder. (VersaMark is THE most amazing ink pad ever!) The top and bottom borders is from Fiskars that my DH bought a few years ago for me. It's actually pretty cute, this was the first time I used it. I think this whole project came out pretty cute. Now to fill it with candy and hopefully the teachers like it as much as I do!
Subscribe to:
Posts (Atom)